How lovely are transparent glass baubles for the Christmas Tree? We’re talking about those delicate, charming ornaments that capture the surrounding light with the purity of glass, reflecting endless sparkles. Inside them, like in a tiny treasure chest, lies a small world of colour and festive charm: sprigs of holly, soft feathers, flower petals and leaves. And what if we told you that making transparent Christmas baubles is easier than you might think? That’s right — with just a few simple tricks, and using the materials you’ll find in our online store, you can create your own customised transparent Christmas baubles, perfect for decorating your Tree, or to give as gifts to friends and relatives as a token of good wishes for the coming Festive Season.
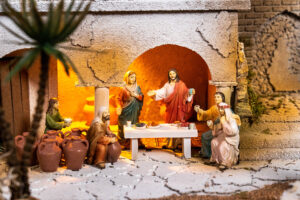
We always encourage our readers to try their hand at DIY. Whether it’s decorating the Christmas Tree,building your own Nativity Scene, or creating handmade Christmas decorations, you’ll find plenty of accessories in our online store to complete your projects independently and at affordable prices. All you need to add is your imagination and a bit of craftiness.
Transparent Christmas baubles are just one of the many items you’ll find in our store. They are blown glass baubles, entirely handmade by specialised Polish artisans. Available in various colours — from sky blue to bright red — the transparent baubles are fitted with a practical metal hook, inserted into a silver cap. To create your bauble, simply remove the hook gently, then insert acrylic paints, glitter, sequins, artificial snow, as well as leaves, dried flower petals, bits of bark, even pieces of paper or tiny figurines — anything your creativity suggests. Once your decoration is complete, carefully reinsert the hook into its holder, and your Christmas bauble will be ready.
Set of 6 Christmas balls, satin and polished white blown glass, 2.5 in…
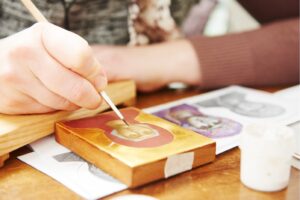
Making your own transparent Christmas baubles can be a very fun and creative project, especially if it involves several family members. Children will love being enchanted by the magic of these delicate and colourful trinkets, but adult supervision will be necessary to avoid accidental breakage. They’re beautiful, but fragile.
Here are some tips for making your transparent Christmas baubles in just a few simple steps.
Set of 6 Christmas balls of light blue satin glitter blown glass, 3 in. Set of Christmas balls of blown glass with a light blue…
Materials Needed
We’ve already suggested where to find empty transparent glass baubles. You’ll also need acrylic paints or tempera, to colour the inside and perhaps the outside of the baubles too. In art supply shops you’ll also find special paints for glass, with beautifully bright metallic effects. Make sure you have paintbrushes and clear glue to secure your decorations.
Then choose glitter, sequins, artificial snow, sprigs of holly and pine, small pine cones, or tiny rolls of paper printed with verses of Christmas carols — in short, anything that can be placed inside the baubles without breaking them. Decide on the colours and decorative elements you want to use inside your baubles — whether they match your Christmas Tree, and perhaps a style to take inspiration from.
Christmas Trees of the best brands: if you are looking for an original and unique Artificial Christmas Tree you are in the right place…
Decorating and Ideas for the Christmas Tree
Before you begin, make sure the bauble is clean and dry, both inside and out. For a very charming effect, pour a little acrylic paint or tempera inside and gently rotate it so that the paint spreads evenly across all the inner surfaces. You can use more than one colour to create different effects. Add glitter or other decorative elements.
Let the bauble dry with the paint inside, and once it’s dry, add other details or decorations on the outside, such as designs or glitter glue. Make sure all added decorations are completely dry. You can create patterns on the surface of the baubles and add more glitter for a sparkling touch. We suggest small compositions — perhaps a base of artificial snow, on which you can place a sprig of evergreen with its tiny pine cone, or maybe a coloured bauble.
By pouring several shades of nail polish inside the sphere and gently rotating it, you can create a marbled effect.
You can recreate a snow effect by pouring clear glue inside the bauble and adding white glitter or small polystyrene beads to create the impression of falling snow.
If you’re particularly skilled, you could try your hand at decoupage: cut out small pieces of Christmas wrapping paper or decorative napkins and glue them inside the sphere with decoupage glue. This will create a beautiful, colourful and translucent effect.
Add three-dimensional objects inside the baubles, such as beads or tiny toys. Or include photos, notes or personalised decorations that represent special memories or happy moments from the year.
Around the bauble, you can glue ribbons or bows for a more elaborate external decoration.
In short, let your imagination run wild!
Once you’ve completed all your decorations, carefully replace the lid and hook on the bauble.
You can experiment with different techniques, colours and materials to make your transparent Christmas baubles unique and special. Have fun!
The expulsion of the merchants from the Temple of Jerusalem represents an act of rebellion by Jesus against a now...
25 February 2026
What’s the Future of Religion?
What’s the Future of Religion?
A Beginner’s Guide to Christianity
A Beginner’s Guide to Christianity
Mind-Blowing Statistics About Christianity You Need to Know
Mind-Blowing Statistics About Christianity You Need to Know
8179
Enter the Holyart world: $20 discount voucher valid on over 60,000 items
Come and discover Holyart, the largest e-commerce of religious articles in Europe and immediately receive a $20 voucher to use with your first purchase.
Check your mailbox: you will receive your discount within 5 minutes