The Nativity scene is, along with the Christmas tree, one of the most widespread traditions linked to this unique festival. We at Holyart encourage the creation of DIY Nativity scenes every year, perhaps because we like to believe that they are the very heart of this tradition, in building, perhaps together with the rest of the family, a unique Nativity scene, which speaks of us, of our childhood memories, of our way of living Christmas.
But, in practice, what do you need to do to build a DIY Nativity scene? Let’s see point by point how to organise the work, from the Nativity scene background to the Nativity lights, borrowing some ideas from the artisans and making the most of the recycled materials.
Nativity scene accessories and miniatures. Useful accessories to make and personalize your Nativity scene.
Where to start a DIY Nativity scene
The first decision to make is only apparently trivial: where do we want to build our Nativity scene? If we think of the large handcrafted Nativity scenes, those that are built on the occasion of Christmas at places of worship, which can be visited on festive days, we realise that entire rooms are used solely for this purpose. Without claiming to achieve the same result in our home, we must surely consider how much and what space we intend to dedicate to the Nativity scene, because based on this decision the entire project may vary greatly. Many choose to build the Christmas Nativity scene at the foot of the Christmas Tree, to complete the preparation for the Feast in a single corner of the house. The Nativity scene can be built directly on the floor, but this can be a problem, for daily cleaning, or if there are pets or small children in the house attracted by everything unusual and colourful. A stable table can be a suitable base, but some choose to build the Nativity scene inside a piece of furniture, in a fireplace, a trunk, a barrel, a lantern, or even an old TV!
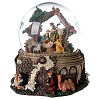
Liquid glitter snow globe with lever to make the snow fall and “Silent Night” music.
The basic requirements for the choice should be: a central position concerning the house so that everyone can easily see the Nativity scene, but, at the same time, it should not represent an obstacle to daily life and the right natural lighting, or the possibility of creating effective points of light to illuminate it. The base on which we decide to build the Nativity scene will ultimately be fundamental because it will influence the number of statuettes we can have, how many scenes we can represent, and of course, in this choice we will also have to take into account the size of the statuettes in our possession, to create a proportionate scenario.
What materials to use to make a DIY Nativity scene
Once we have established where to place our Nativity scene, we need to think about the materials with which to build it. Usually for the DIY Nativity scene, natural materials are preferred, such as wood, cork, bark, rocks, and pebbles, but for the base, old cardboard boxes covered with parcel paper, or better still withrock paper for Nativity scenes, to imitate the mountains, or sheets of plywood or polystyrene, which can be cut and shaped according to your needs, lend themselves very well. The most skilled can also try their hand at experiments with polyurethane and polystyrene, or foam, which can also be easily shaped.
Synthetic or natural moss, real straw, synthetic trees or tree made using natural lichen, cork and stones.
How to make a Nativity scene on multiple levels
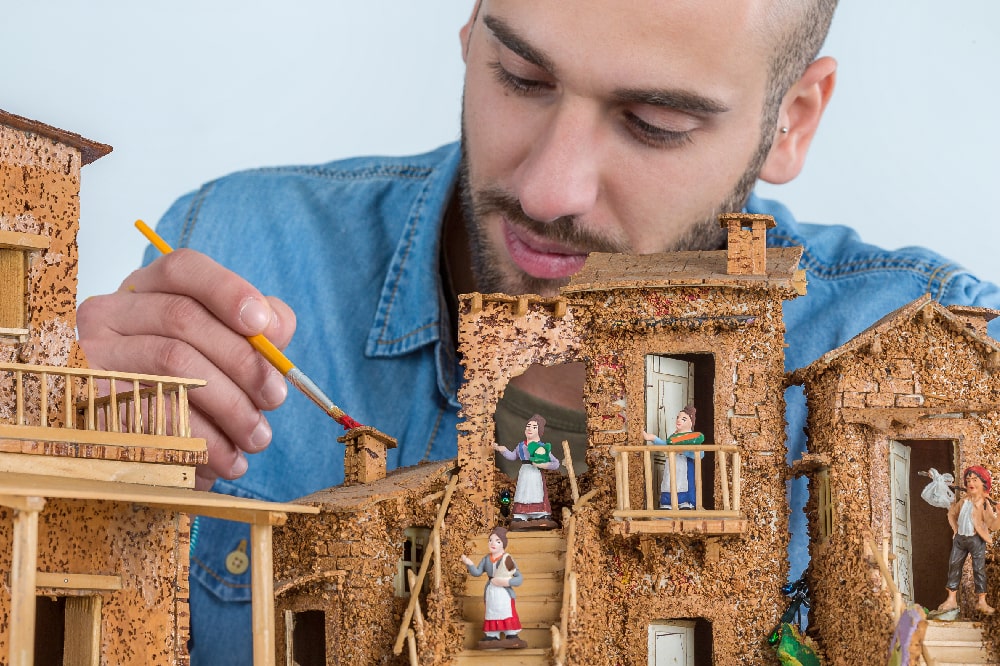
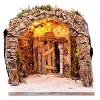
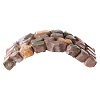
Once our base is established we can begin to work out the scenario for our Nativity scene. It can be interesting, and easier to do than to say, to create a perspective game with cardboard boxes, cork cubes, and books, covered with rock paper and moss, to simulate heights and thus create a Nativity scene on various levels. The more complex the structure you have in mind, the more you will need to design it well before doing anything else. It is fundamental in a Nativity scene on several levels that the hut, or the cave of the Nativity always occupies a predominant place, in short, it is in the foreground, and with it all the most important buildings and characters, but also the largest statues, to give a sense of perspective.
Suitable for nativity figurines measuring 12-14-16cm.
Smaller statues and scenes will be placed on the second and third floors until they reach the backdrop, where there will be no characters, but only landscape elements, and a background that can be made more realistic with bright games of light. As for the background, you can use the classic sky, made with blue paper decorated or not with stars, or a painted landscape, always on paper, or mounted on cork or cardboard panels. If you want to better wrap your Nativity scene on several sides there are also panels mounted as a triptych.
How to build homes
As for the Nativity houses and buildings, we can also choose between different materials, depending on our manual skills. The polystyrene blocks can be easily shaped with a cutter, to obtain the various parts of our houses, which we can then assemble with hot glue or vinyl glue, after painting them with acrylic colours. Cardboard also lends itself well to the construction of houses, although it is light and therefore more difficult to use, while plywood is certainly a more stable solution, but also more expensive and difficult to process. If you are more experienced, you can try using polyester, which can be shaped with special tools, and putty, which lends itself to very realistic creations. In addition to the location and size of the various buildings, to respect the perspective focus, pay close attention to details, roof tiles, and small decorations, because they will make a difference when the work is finished.
The choice of colours to use for the Nativity scene depends first and foremost on the materials we have chosen to use. The colours for cardboard and paper will not be the same for polystyrene or wood, in short. Plaster elements must be passed with a solution of water and vinyl glue before proceeding with the colour, while polystyrene and polyester must be treated with a layer of vinavyl and then coloured with acrylic-based spray. On the Internet, you can find many useful tutorials to colour the different materials in the right way, and also to reproduce suggestive effects on your supports, such as the rock of the mountains, the roughness of a wall, a brick wall and so on.
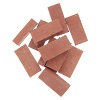
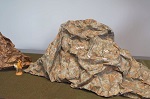
How to put rock paper in the Nativity scene
Nativity scene rock paper is a very versatile and useful element, which cannot be missed in our DIY Nativity scene. Used to cover boxes and blocks of cork and polystyrene it will be an excellent base on which to place our figurines. Traditional rock paper is on the market, very simple to use, appearing as lightweight sheets of paper with prints that take on the colours of natural elements, or mouldable rock paper, made with an aluminium layer that makes it mouldable, resistant and waterproof.
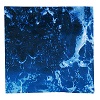
Enriching our DIY Nativity scene with a stream or a waterfall, better if powered by a special scooter and a water pump, will be a challenge that will lead to surprising results. Of course, if you do not want to try your hand at a realistic river, you can opt for the classic foil that, carefully shaped, can give the illusion of a waterway, or use other scenic systems.
The nativity scene background has a water design. Moldable paper allows you to create beautiful opaque reliefs.
If we use water, it will be necessary to isolate the course of the river using plastic or resin trays and accessories, to avoid damage to the rest of the structure. And on our river, you cannot miss a wooden, terracotta or cork bridge, a pretty element, but also of great symbolic value, like most of the elements of the Nativity scene. In particular, the bridge indicates the passage through the beyond and the unknown, while the river represents time and the flow of life.
Resin low wall in the shape of an half circle of 1 cm depth, suitable to create a small garden setting.
What to use as an alternative to moss in a DIY Nativity scene
Vegetation is also a valuable element to decorate and embellish our DIY Nativity scene. If we do not want to gather moss, which is easily found in nature, we can buy it. In our online shop, you can find it both real, but coming from plantations and areas used for its cultivation, and synthetic, along with palm trees, trees, lichens, bushes and decorative straw. Alternatively, you can use green fleece, plush fabric, painted sawdust, or dried and glued herbs, according to your imagination.
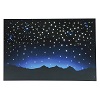
How to make the Nativity scene background
We have already mentioned the importance of the background for the Nativity scene. In our shop, in addition to starry skies in paper, cork panels, painted landscapes, and complete sets to build mountains, you can find many useful materials and accessories to build your Nativity scene step by step.
Nativity scene background, landscapes and panels. Rolls of paper for backdrops.
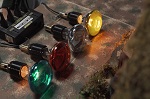
How to put lights on the Nativity scene
Lighting is a fundamental element of the Nativity scene, but you have to pay attention to some simple but fundamental rules to avoid unpleasant accidents. First of all, pay attention to the choice of lights, which are of quality and comply with safety standards, to avoid overloads and short circuits. Sockets and any extensions must also be safe and compliant. It is better to always use linear, not circular lights, fixing them with adhesive tape and taking care to cover all the wires well with elements of the scenery, such as moss, straw, and sand. There are special control units on the market, which allow you to create very suggestive lighting effects, with fades and intermittencies, such as the day and night cycle, sunrise and sunset, or reproduce the effect of fire or lightning. The most modern ones can be programmed with a special computerised system for truly amazing results!
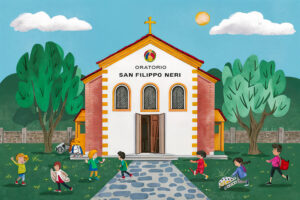
Saint Philip Neri served God and man with devotion, joy, and extraordinary warmth. The Apostle of Rome and the Saint...
25 May 2026
What’s the Future of Religion?
What’s the Future of Religion?
A Beginner’s Guide to Christianity
A Beginner’s Guide to Christianity
Mind-Blowing Statistics About Christianity You Need to Know
Mind-Blowing Statistics About Christianity You Need to Know
4750
Enter the Holyart world: $20 discount voucher valid on over 60,000 items
Come and discover Holyart, the largest e-commerce of religious articles in Europe and immediately receive a $20 voucher to use with your first purchase.
Check your mailbox: you will receive your discount within 5 minutes